Photo supplied by the client to use in the article – Atlantic Cement Rendering Sydney
Cement render is a strong and attractive choice for walls inside and out. Like all building materials, it can be affected by movement, moisture, or age. Even the best render may eventually crack, which can affect how your wall looks and how well it holds up. Learning how to fix these cracks the right way helps you keep your walls looking good and lasting longer.
Whether you have small cracks from settling or bigger ones caused by moisture, fixing cement render crack repairs takes patience, good preparation and the right method. This guide will walk you through how to repair cracks in cement-rendered walls and bring them back to their best.
Preparing the Work Area for Success
A good render repair starts with a tidy workspace. Before you get your tools, clear away anything nearby so you don’t trip over furniture, debris, or loose items. This is extra important outside, where dust and bits of render can spread easily. Use drop sheets or plastic to protect your paving, plants, or floors and make cleanup easier.
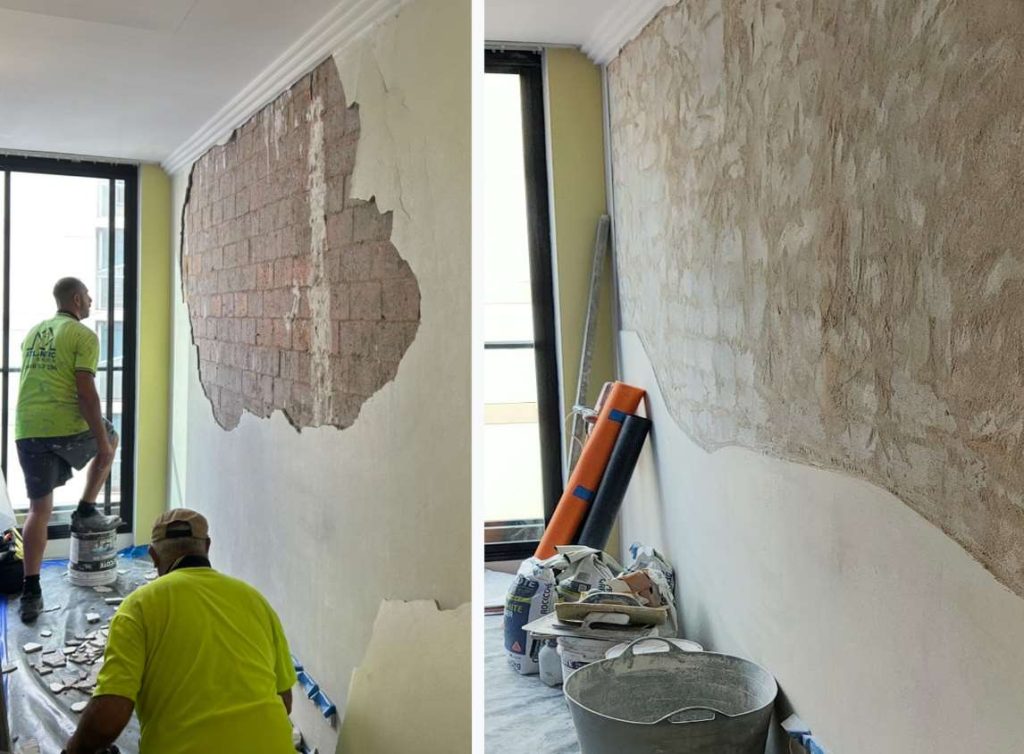
After you’ve organised the area, focus on the wall. Remove any loose, crumbling, or hollow-sounding render, or the patch won’t stick well. Brush away dust, dirt and small pieces to make a clean, solid base for the new material. If you’re working on a bigger job, wear safety glasses, gloves and a dust mask to protect yourself from fine particles.
Taking time to prepare may seem slow, but it makes repairs go faster by giving you a safe and clear space to work.
Before mixing a single batch of patching compound, take time to diagnose the type and cause of the cracking. This step ensures you select the proper repair method and helps prevent the issue from returning.
Cement render can crack for many reasons. Small hairline cracks often come from the wall moving or from changes in temperature, especially in warm places where surfaces heat up and cool down quickly. Wider cracks might mean there’s bigger movement in the structure or moisture getting in, which can weaken the render over time. In coastal or rainy areas, trapped moisture can cause stains, blisters, or deeper cracks.
Carefully examine the wall for patterns in the cracking, any areas of discolouration. Look closely at the wall for crack patterns, discoloured spots, bubbling, or dampness and check whether the render sounds hollow when you tap it. Also, see how serious the damage is. Surface cracks are usually easy to fix, but deeper ones might need more work or even re-rendering part of the wall. than simply covering over the visible symptom.
Choosing the Right Tools and Materials
Once the problem has been assessed, you can gather the tools and materials. After you know what you’re dealing with, gather the right tools and materials. Most crack repairs need a trowel, putty knife, stiff brush, sanding block and good patching compound. If the crack needs extra strength, you might also need a two-part epoxy or another strong anchoring material. Loose should closely match the texture and composition of the existing render; otherwise, the repaired area may look noticeably different once it’s dry. Please read the manufacturer’s instructions carefully as each compound has its own mixing ratios, curing times and finishing requirements.
Getting everything ready before you start helps you work calmly and lets you apply the patching material at the right consistency.
Repairing Cracks and Achieving a Seamless Finish
Once your surface is ready and you have your materials, start the repair. Brush out the crack well to get rid of any hidden dust or bits, making sure it’s clean. Then, mix the patching compound with water until it’s smooth and easy to spread.
Use a putty knife or trowel to press the compound firmly into the crack, making sure it fills all the way in. Add it in thin layers instead of one thick one, since thin layers stick better and are less likely to crack again. Once the crack is filled, smooth the area so it matches the rest of the wall and let it dry completely.
When the patch is dry, lightly sand it to make the texture even. If the crack is big or deep, you might need to repeat the steps. Before the compound sets, you can use a damp sponge to blend the edges for a more natural look.
Final Inspection, Sealing and Maintenance
When the patched area is completely dry, check for any uneven spots or small gaps that need fixing. Once you’re happy with how it looks, put on a sealant or membrane that works with render to protect the wall from moisture and sun. This last step helps your repair and the whole render last much longer.
To stop new cracks from forming, keep up with regular maintenance. Clean the wall gently every few months to get rid of debris that can hold moisture. Check the wall once a year to catch any early signs of damage before they get worse.
When to Call a Professional
While DIY repairs can be effective for small problems, if you have large cracks, structural movement, or the render keeps failing, it’s best to call a professional. Experts have the right knowledge, tools and solutions to fix the problem for good.